Instructions for purchase/setup of your own GoDaddy Virtual Private Server (VPS) to host a Web+Center application.
Overview:
There are many reasons why you may want to migrate your Web+Center application to a hosted VPS environment. We recommend you review the IIS newsletter we wrote back in 2015 about VPS benefits called Web+Center on hosted VPS servers .
This article gives reasons why you should consider this options for your next Web+Center installation. This page will focus on the actual steps and the exact product you need to purchase and recommended VPS configurations.
You can use these steps for installing a FREE (2) tech version of Web+Center or optionally you can purchase a licensed (more than 2 techs) version of our software and install that key on this Godaddy VPS.
Rather than having Internet Software Sciences resell Godaddy VPS services, we recommend you purchase the VPS option that is appropriate for your organization. Having your own VPS allows you to configure your own integrated windows LDAP/AD tools and models to your own networks if needed. If you want to host other applications on your VPS, you can do that as well since you are in complete control of that VPS.
Step 1 – Purchase the GoDaddy Windows VPS service for a set term (1-12-24 months).
By clicking on the banner below there should be a special Internet Software Sciences 30% discount available!
(Click on the banner ad below and follow the directions listed below the banner ad)
- Click on Hosting
- Servers.. Virtual Private Servers
- See Windows Plans – Web+Center does not run on Linux servers
Web+Center is a very light weight web server application and does not require much disk or CPU and most users only need to purchase the Economy package. The initial pricing of the package says $26/month but then it also says renewal for later months at $39.99 per month. But this monthly pricing drops if you sign up for 12 months.
Internet Software Sciences is contacting Godaddy to work out some special pricing options for Web+Center installs in the future.
Recommended VPS options:
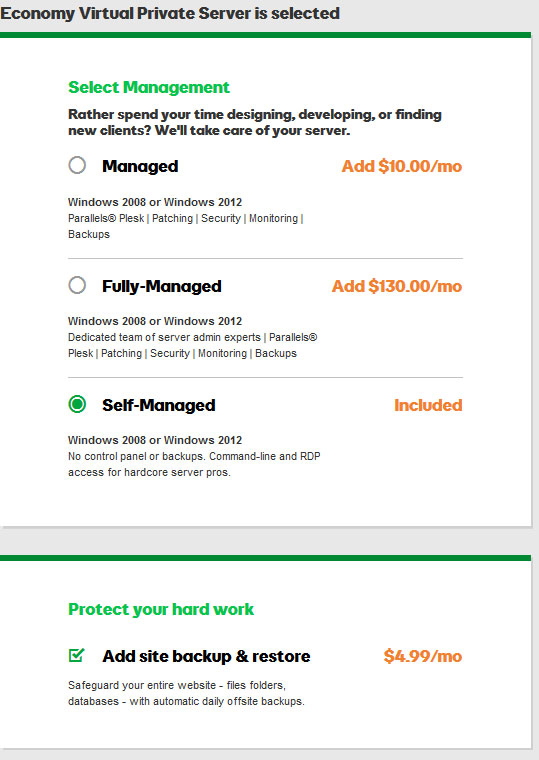
Once you click on Add To Cart option, you will be presented with some options to configure your VPS options. The best way to host the Web+Center on a VPS is to use the default un-managed server configuration that allows you direct “windows” remote desktop control of the machine rather than an added server management layer like PLESK. Web+Center and other web applications require you access the Windows control panel/administrative tools directly and if PLESK is installed, you may run into conflicts. It is also cheaper to not have the PLESK product installed.
So on the CART page, select the Self Managed option (save $10/month).
We also highly recommend you do purchase the Add Site backup and Restore option to your VPS at $5/month.
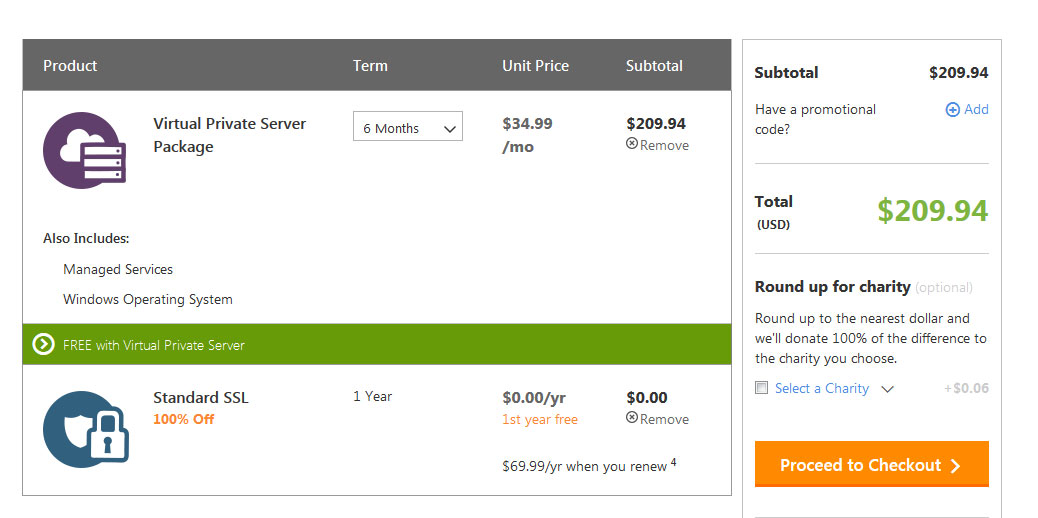
Click continue to select your VPS contract length and other options.
** NOTE: Prices were researched March 2017 – These might have changed and these prices listed do not represent what prices you will be quoted in the future.
On this screen you can select the term of your plan from 3 months at $37.99 per month to 6 months at $34.99 per month to $29.99 per month for 12 months. Generally, the longer the term the better the pricing. We recommend 6 months minimum. From years of being a GODADDY VPS customer, if you contact them by phone 3 months in and ask to extend the contract to another year they can offer even bigger discounts.
Wait??
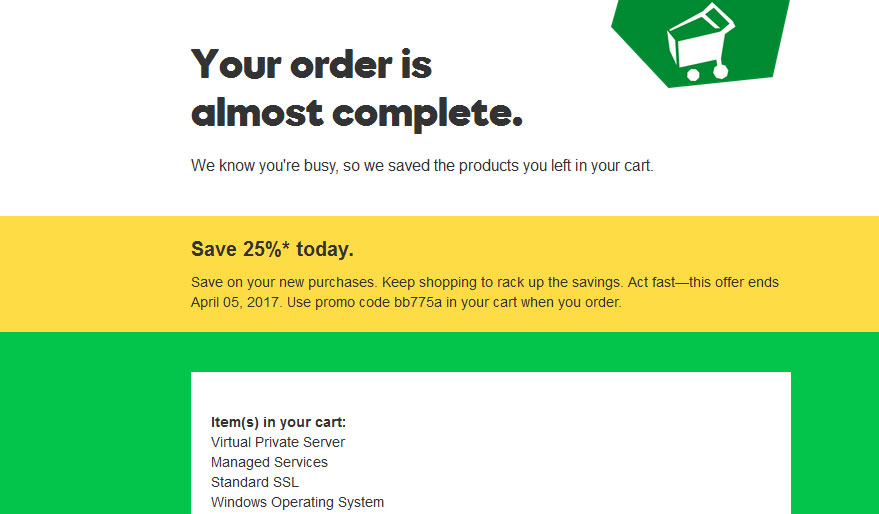
VPS and hosted servers is a very competitive market and the price continues to drop. GoDaddy really wants you to sign up with them since once you sign up and setup a system, you are likely to stay with them for a while. So while I was researching the pricing, I was logged in as a GoDaddy customer and they noticed I had abandoned my shopping cart for this VPS product. I received an email offering me 25% percent off my VPS order!
Purchase:
Once you have purchased the VPS product on your credit card, you will be sent information on how to access your VPS server remotely.
Initial New VPS setup:
From the email information, you will given a static IP address for your server. Using windows remote control connection on your windows machine, remote into your new server.
Download and install another browser and TEXTPAD
Once logged in and remoted into your new VPS server as administrator, we recommend you download the following to assist in your Web+Center install and customization options.
- Download another Web browser besides the default Microsoft Edge/Explorer. We recommend chrome and/or Mozilla.
- Download better Text editor TEXTPAD from Textpad.com. This far superior text editor to Notepad will be helpful for editing the Web+Center ASP script files and aid any Web+Center customizations.
Install IIS (Internet Information Services) on your Windows 2012 server
By default, the web server is not installed on your VPS windows 2012 server. It is important you install IIS with the correct features to run website applications such ASP, service side includes, etc.
Download and Install Web+Center on your VPS
To install Web+Center on your machine, please download and follow latest V9 install instructions.
When configuring your SMTP host address, your SMTP settings should be:
SMTP host address: dedrelay.secureserver.net
SMTP user name : leave blank
SMTP password: leave blank
Testing the software on the Internet
To test the Web+Center install on the internet, simply bring up a browser in your own environment and enter the URL of:
http://VPS assigned IP address/tech90
Assigning a subdomain address to point to your your VPS
You will most likely want to create an easy to remember URL to access this server rather than some IP address like http://208.15.23.202/tech90/.
To create a subdomain URL like:
http://support.Mycompany.com
You will need access to your domain settings for your domain. Using the domain name manager tools that are handling your domain registry, you can add a new subdomain called support and put in the information of the godaddy VPS IP address.
Domain name tools vary from vendor to vendor but Domain name registrars can assist you with this. It is possible to create and purchase a new domain to point to your VPS server too if you don’t want to add a subdomain to your current domain. Simple research and purchase a new domain and use the domain registration tools point that domain to the IP specified in your VPS server assignment.
TWO other IP available for other complete sites
Your VPS comes default with a pool of 3 static ip addresses for that server enabling you to create (3) unique web sites on that single server. We recommend you use the default website for your first Web+Center install. Your VPS can be used for other sites and programs besides Web+Center.
Transferring files between your machine and the VPS
One of the immediate advantages of remote desk to the VPS from your windows machine is the ability to simply copy and paste files using Windows file explorer copy/paste function. Simply copy files on your machine, click over the VPS remote desktop connection and select PASTE. Depending upon your network settings, this may not be possible.
More advanced windows/network integration options
If you wish to have the VPS join your domain or have access to your LDAP/AD server, there are ways to create VPN between machines to allow some integration between your VPS machine and your local network.